Amabie costume
In 2020, a fairly obscure yokai called Amabie started to trend on Japanese Twitter with #AmabieChallenge.
There are variations to the story, but the legend says that a mermaid-like creature with long hair, a beak, scales, and three legs or fins emerged from the sea in the late 1800s to give a warning and advice. It predicted six years of good harvest and then a pandemic. To stave off the disease, Amabie said to draw its picture and show that picture to as many people as possible.
Since this whole concept was still relevant in 2021 but not bad enough to cancel Halloween altogether, and Amabie has become near and dear to my heart, that's what I did.

Process
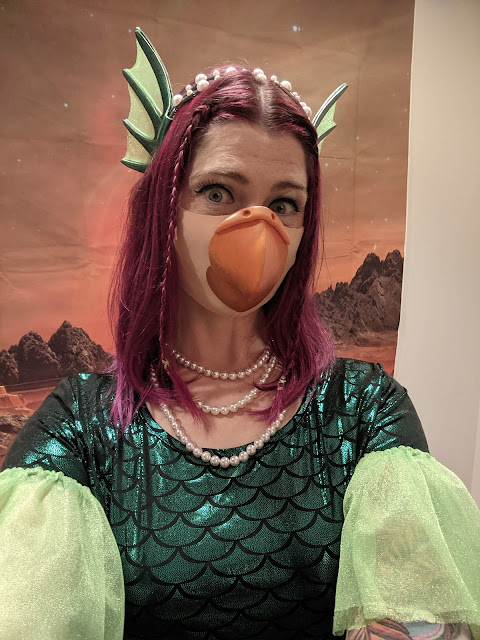
Beak
There are two parts to the beak, the beak itself and the mask to hold it to my face (note: also thematically appropriate). While I was developing the beak from paper and then craft foam, I was also looking for me-colored masks to attach the beak to. Both of these took a few tries and some trial and error, but the end result was everything I hoped it would be.
Legs
I used some gray scrap fabric as a test to try to determine what kind of fabric I needed, how I should arrange it, how to attach it, and how much I needed.

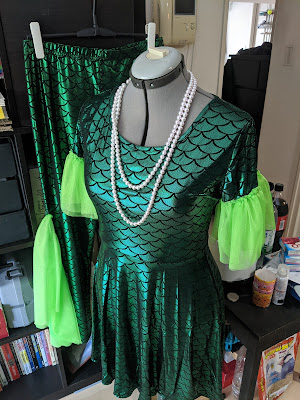
Tail
I had originally hoped I could just find more of the same fabric the dress and leggings were made of and get a couple yards to make the tail, but that didn't work out. So I got some emerald green satin and cut out a tail shape, sewed it together, and stuffed it with some batting I had left over from the dinosaur costume mystery gift. Then I scanned the leggings to get the pattern, traced it in the computer, and printed myself a template to draw all the tail scales on (a Sharpie and a half, if you were wondering). When at long last that was done, I attached it to a belt and added the same bright green fabric I used as fins on the legs.
Sleeves
This also took some trial and error, but I like the accent color from the legs, tail, and ears repeated on the sleeves.
Headband
Another wearable prop started from paper and finalized in craft foam.

Painting is my favorite part, and adding the depth to these (flat!) foam shapes went better than I had hoped.
I doubled the fingery shapes so they would wrap around the headband and hide both the webbing fabric and slivers of thermoplastic. The plastic was used to curve the ear fins so they were perpendicular to my head rather than parallel. That made a world of difference in how well it photographed!


Comments
Post a Comment