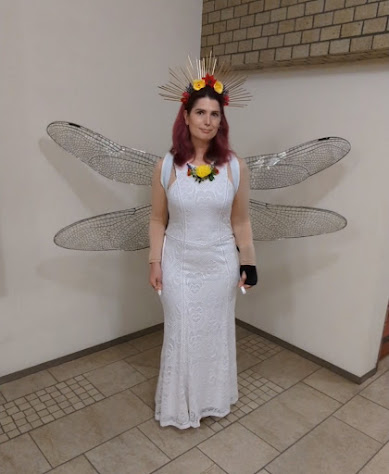
Fairy Queen costume
The original plan was to go as a dragonfly, but the thing about dragonfly wings is that they stick out perpendicular to the body. This is not practical for moving around a small apartment or a crowded city, so they needed to be able to move.
And then the wings took so much time that I just couldn't pull together anything else for a dragonfly (I also couldn't decide how to handle the eyes). So I pulled a white dress out of my closet (from my Bast costume), made a quick zip tie crown, and called it a fairy queen.
The moving wings required a TON of trial and error.
 |
| This was the first concept test. Gears may have been a more solid construction if they had worked, but it didn't end up being practical. |
It went from gears to pulleys,
then there were changes in the placement and pulling mechanisms,
then figuring out how to keep the wings from hitting each other,
then testing which direction to pull (around the waist or over the shoulder),
then how to divide the wings so each hand activated two of the four wings (first try was left/right but upper/lower allowed more room for error),
calibrating the ribbon through the buttons and the button placement was a huge pain in the neck,
then how to determine when to stop pulling when I couldn't see myself (solution: pulley ribbons threaded through D-rings on the dress, when the button hit the ring that's when to stop).
One quick detail note. To secure the wings to the pulleys I needed to find washers with a small interior hole diameter and a significantly larger exterior diameter. I tried several hardware stores near me, but just could not find such a thing. I feel like my solution was clever – it turned out 5-yen coins were exactly right!
Not every step is shown in these process videos, but you get the idea!
Short version for the wings, a motion test montage:
Short version for the crown; pardon the thumbnail, I can't customize it on a video shorter than one minute and it defaulted to the worst possible step of the process:
Long version with a more complete process (skipping some of the less interesting steps):
If I were to do this again, I think I would integrate some electronic components for easier calibration and probably a faster build, but I feel pretty good about the analog engineering. Electronics would have required me to bring someone else in to help, and I wanted to see if I could handle a solution on my own. Success!


Comments
Post a Comment