My illustration pen pal loaned me another Griffin and Sabine book, and I returned it with a handmade card. This one plays around with the format, and features an octopus holding a message in a bottle. Process video: I ended up making several of these, but I think I want to go back and adjust the design a bit. I love the look of the suckers being cut from the front piece of paper to reveal the back, but the finer details are hard for the Cricut to handle without tearing. This card also doesn't fit into a standard envelope. The plan is to make at least one alternate version of this concept that is easy to replicate, to be added to my (brand new!) Etsy store , which currently features kokeshi doll cards .
Don't want to read? Here's a 2-minute video instead! The concept for my 2023 Halloween costume was the Starbucks siren, as seen in their logo (although taking some artistic license to wear clothing from the waist up and not doing gymnastics, so we're not going for 100% accuracy). Image from https://www.linkedin.com/pulse/starbucks-logo-evolution-tale-design-history-kaizen-tech-global My starting point was the leggings from my Amabie costume and a green bodice I got a million years ago (intending to make a Poison Ivy, although that has yet to happen). Phase 1: Bodice The first step was to add scales to the bodice to match the leggings as much as possible. I used my scan of the leggings from Amabie to make shapes to send to the Cricut to cut out of fabric. I wasn't convinced that sticky vinyl would stay put on the satin, so I ended up backing some polyster with fusable interfacing for durability and hand sewed it on. This was a beast of a project, but it was the best wa...
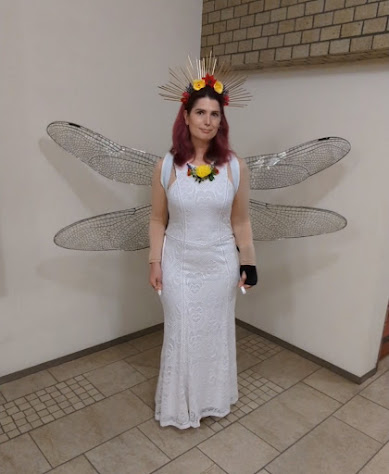
The original plan was to go as a dragonfly, but the thing about dragonfly wings is that they stick out perpendicular to the body. This is not practical for moving around a small apartment or a crowded city, so they needed to be able to move. And then the wings took so much time that I just couldn't pull together anything else for a dragonfly (I also couldn't decide how to handle the eyes). So I pulled a white dress out of my closet (from my Bast costume), made a quick zip tie crown, and called it a fairy queen. The moving wings required a TON of trial and error. This was the first concept test. Gears may have been a more solid construction if they had worked, but it didn't end up being practical. It went from gears to pulleys, then there were changes in the placement and pulling mechanisms, then figuring out how to keep the wings from hitting each other, then testing which direction to pull (around the waist or over the shoulder), then how to divide the wings so each h...


Comments
Post a Comment